 License: 1143915
How to Replace a Garage Door Spring (Safely): Torsion & Extension
A step-by-step guide to torsion and extension spring replacement, real costs, and the safety reasons most homeowners call a pro.
Quick Answer
You can replace an extension spring yourself with care while the door is open and clamped, but torsion springs are wound under extreme tension and are genuinely dangerous — most homeowners should hire a licensed technician. Replacing a spring means matching the exact spring size, unwinding the old one with steel winding bars, installing and re-tensioning the new spring, and re-balancing the door. Professional replacement runs about $180–$450 and includes a cable check and balance test.
A broken garage door spring is one of the most common garage door failures — and one of the most dangerous to fix. If you searched how to replace a garage door spring, this guide walks through exactly what the job involves, how torsion and extension springs differ, how to measure the right replacement spring, the tools required, realistic cost, and the safety reasons most homeowners hire a pro. Garage door springs are wound under enormous tension, and a single mistake can cause serious injury, so read the safety section before you touch anything on your garage door.
How Garage Door Springs Actually Work
Your garage door weighs between 130 and 350 pounds. The opener does not lift that weight — the springs do. The springs store energy when the door closes and release it to counterbalance the door as it opens, so the opener only has to overcome a few pounds of imbalance. That is why a door with a broken spring feels impossibly heavy and why the opener strains, hums, or lifts the door an inch and stops. When you replace a garage door spring, you are restoring that counterbalance, which is also why the correct spring size matters so much: a spring that is too weak or too strong leaves the door unbalanced and wears out the opener, the cables, and the rollers.
Signs Your Garage Door Spring Has Failed
Before you replace a garage door spring, confirm the spring is really the problem. The most common signs of a broken or worn garage door spring are:
- A loud bang from the garage. A snapping torsion spring releases all its tension at once and sounds like a firecracker or something heavy falling.
- The door will not open, or feels extremely heavy. With a broken spring, the opener cannot lift the door and a manual door feels like dead weight.
- A visible gap in the torsion spring. Look at the spring on the bar above the door — a two-to-three-inch gap in the coil means the spring has broken.
- The door opens crooked or jerky. One weak spring on a two-spring door makes the door rise unevenly and bind in the tracks.
- The door drops fast or slams shut. A stretched, worn spring no longer holds the door’s weight.
Torsion Springs vs Extension Springs: Know Which You Have
Before you can replace a garage door spring, you need to know which type your door uses, because the replacement process is completely different and the risk level is not the same.
Torsion springs
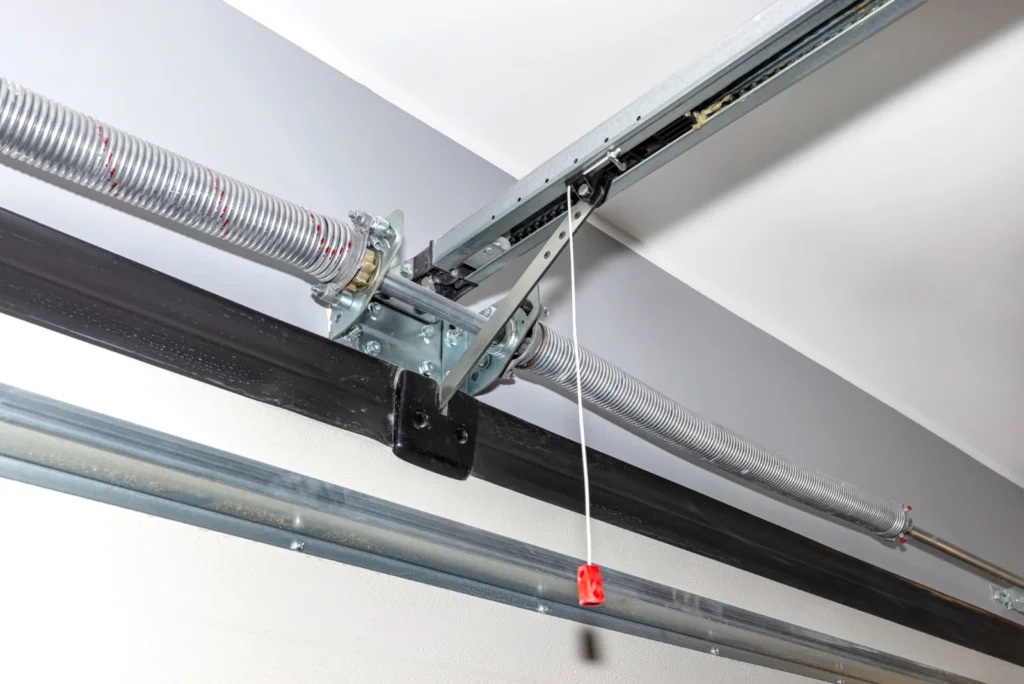
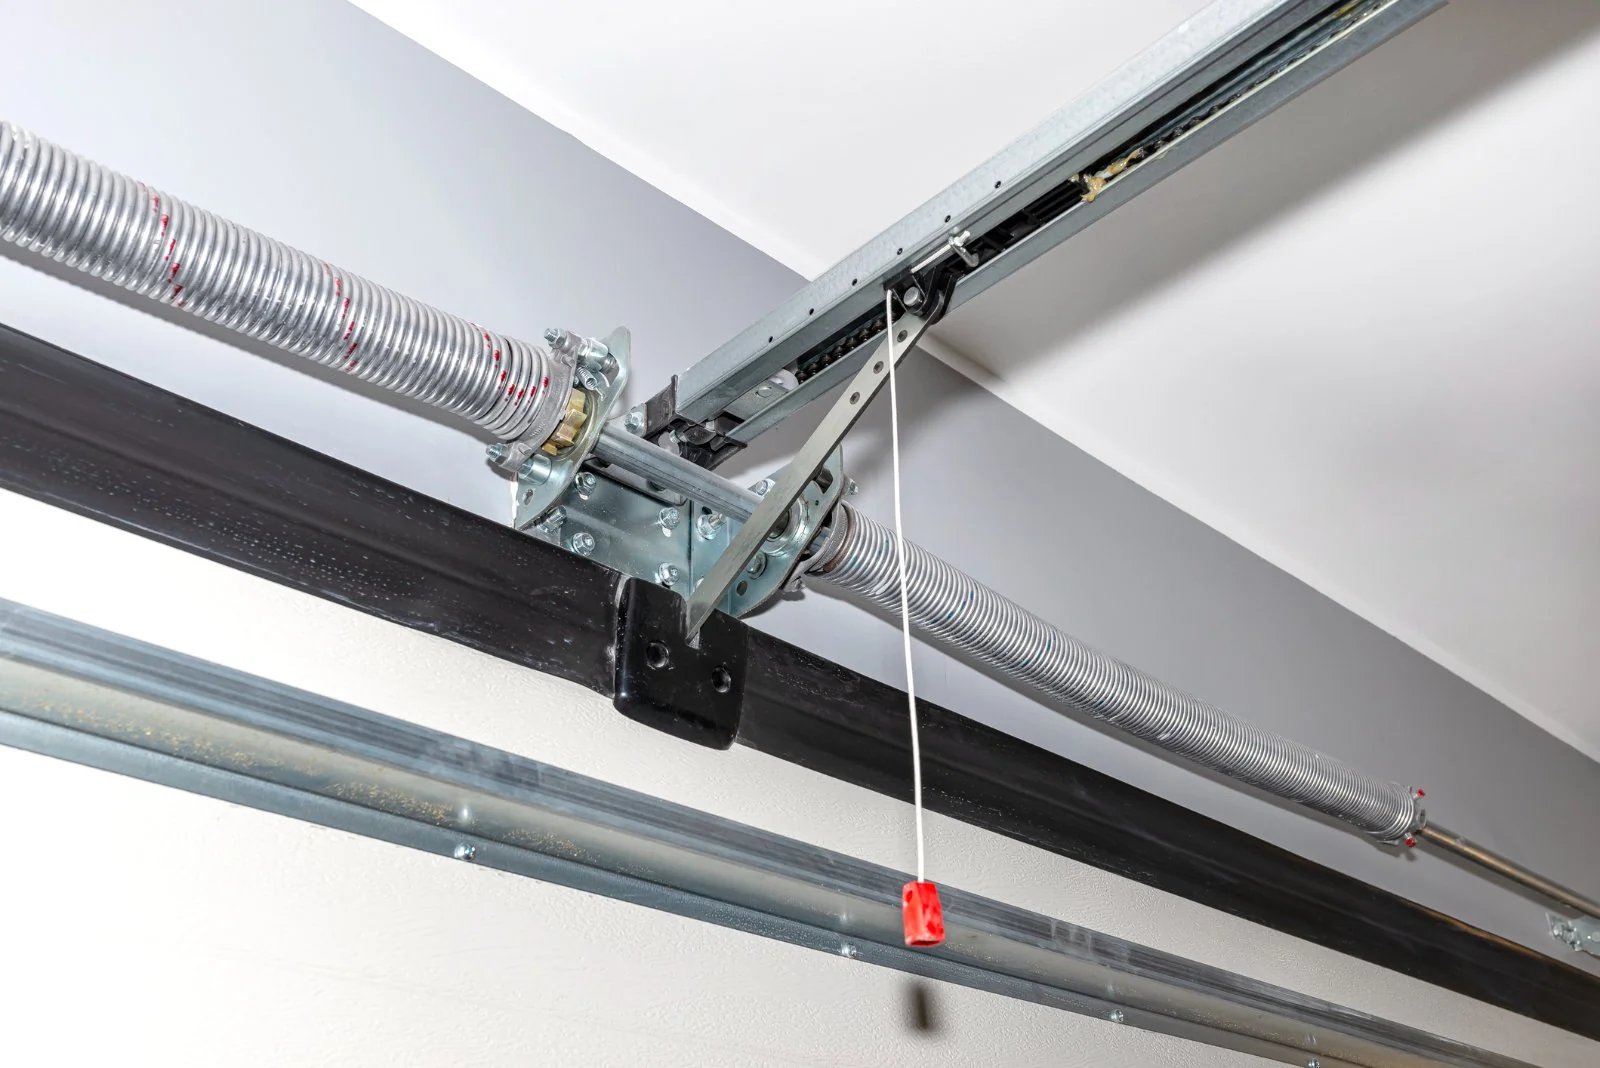
Torsion springs mount on a metal shaft (the torsion bar) directly above the closed garage door. They wind and unwind to lift the door and store a huge amount of energy. Most modern sectional garage doors use one or two torsion springs. They last roughly 10,000 cycles and are the most powerful — and most hazardous — spring to replace. If your door has a bar running across the top with one or two springs on it, you have torsion springs.
Extension springs
Extension springs run parallel to the horizontal tracks on each side of the door and stretch as the door closes. They are common on older and lighter doors. Extension springs should always have a safety cable running through the center, so that if the spring snaps it cannot fly across the garage. If your door has a long spring above each horizontal track, you have extension springs.
Safety first: A wound torsion spring holds enough force to break bones, fingers, or worse if it releases suddenly. Winding bars can be thrown across a garage in an instant. If you are not fully confident with winding bars and setting tension, this is a job for a licensed technician. One Stop Garage Doors & Gates replaces springs safely every day — call 650-910-6090.
Is It Safe to Replace a Garage Door Spring Yourself?
Honestly, torsion spring replacement is not a beginner DIY project. The springs are under extreme tension, the winding process is unforgiving, and using the wrong-size spring leaves the door unbalanced and burns out the opener. Extension springs are somewhat less dangerous when the door is fully open and clamped, but a broken extension spring still stores energy and the lift cables are also under load. Every year, homeowners are injured attempting this repair — usually when a winding bar slips or the tension is released too fast. If you have any doubt about the process, the modest cost of a professional garage door spring replacement is far cheaper than an emergency-room visit or a damaged door and opener.
How to Measure a Garage Door Torsion Spring
If you are going to replace a torsion spring yourself, you must order the exact spring — there is no universal garage door spring. A correct torsion spring is defined by four measurements:
- Wire size. Measure 10 coils, then 20 coils, and compare to a wire chart. Wire diameter determines how much weight the spring supports.
- Inside diameter. Read it off the stationary cone (for example 1.75 or 2.00 inches), or measure the inside of the coil.
- Overall length. Measure the length of the spring coils only, not the cones.
- Wind direction. Left-wound and right-wound springs are not interchangeable. On a two-spring door the left and right springs are wound opposite each other.
Getting any one of these wrong leaves the door unbalanced, so professionals weigh the door and match the spring to it. This precision is a big part of why a correctly done spring replacement lasts years.
Tools and Parts You’ll Need
- Correctly-sized replacement springs (matched to your door’s weight, wire size, inside diameter, length, and wind direction)
- Two solid steel winding bars that fit the winding cone — never use screwdrivers or rebar
- Adjustable wrenches and a socket or nut driver set
- Locking pliers (C-clamps) or vise grips to secure the door in the tracks
- A sturdy ladder, safety glasses, and heavy gloves
- New lift cables if the old ones are frayed — springs and cables wear together, so replace them as a set
How to Replace a Garage Door Torsion Spring
The steps below describe the professional process so you understand exactly what replacing a garage door torsion spring involves. Torsion work is high-risk — proceed only if you are experienced and properly equipped.
- Release the opener and secure the door. Unplug the opener, close the door fully, and clamp locking pliers on the track just above a roller so the door cannot rise while you work.
- Unwind the broken spring. Insert a winding bar fully into the winding cone, hold it firmly, loosen the two set screws, and carefully unwind the remaining tension a quarter-turn at a time, swapping winding bars hand over hand. Keep your body out of the path of the bars.
- Loosen the drums and disconnect the cables. Mark the drum position with tape, loosen the cable drum set screws, disconnect the lift cables, and slide the drums outward.
- Slide out the old spring. Loosen the center bracket bolts and slide the old torsion spring off the bar. If both springs are original, replace both now — the second is close behind.
- Install the new torsion spring. Slide the correctly-rated new spring onto the bar toward the center bracket, reconnect the drums to their taped marks, and re-thread and tension the lift cables so they are snug with no slack.
- Wind the new spring to tension. Using the winding bars, wind the spring in the correct direction to the manufacturer’s specified number of turns (typically about 7 to 8 full turns for a 7-foot door, or roughly 30 quarter-turns), then tighten the set screws firmly onto the bar — not just the seam.
- Lubricate and test the balance. Remove the clamps and lift the door by hand halfway — a properly balanced door stays put on its own. If it rises or falls, adjust the winding a quarter-turn at a time. Reconnect the opener and cycle the door several times.
How to Replace Garage Door Extension Springs
Extension spring replacement is more forgiving because the springs are relaxed when the door is fully open, but you still work with lift cables and pulleys under load.
- Open the door fully and clamp it. With the door up, the extension springs go slack. Clamp the tracks below the bottom rollers so the door stays open with no tension on the springs.
- Disconnect the old spring. Detach the extension spring from the track hanger bracket and the pulley, and remove the old safety cable so you can replace it.
- Install the new extension spring and safety cable. Run a new safety cable through the center of the new spring, hook the spring to the bracket, and reconnect the pulley and lift cable.
- Repeat on the other side. Always replace extension springs in matched pairs so the door stays balanced and rises evenly.
- Remove clamps and test. Slowly release the clamps, lower the door, check that it moves evenly, and adjust the pulley or S-hook position if one side sags.
Common Mistakes to Avoid
- Replacing only one spring. On a two-spring door, the second spring is worn out too. Replace both so the door stays balanced.
- Using the wrong spring size. An off-size spring leaves the door heavy or springy and overworks the opener.
- Over-winding or under-winding. Too few turns and the door will not open; too many and it flies up. Follow the turn count for your door height.
- Skipping the cable check. Frayed cables fail soon after a new spring. Inspect and replace them together.
- Using screwdrivers instead of winding bars. This is how most spring injuries happen. Use bars sized for the cone.
How Much Does Garage Door Spring Replacement Cost?
Doing it yourself, the springs themselves usually cost $30–$100 each, but you also need proper winding bars and the exact measurements. Professional garage door spring replacement includes the correct springs, labor, a cable inspection, and a balance test with a warranty. Cost depends mainly on whether you have one or two springs and the size of the door. Typical South Bay pricing:
| Service | Typical Cost |
|---|---|
| Single torsion spring replacement (professional) | $180 – $290 |
| Two torsion springs (recommended pair) | $260 – $450 |
| Extension spring replacement (pair) | $150 – $280 |
| Spring + lift cable replacement | $220 – $420 |
| Oversized or high-cycle springs | $300 – $600 |
| DIY springs + winding bars (parts only) | $80 – $200 |
For more on how the U.S. Consumer Product Safety Commission views garage door hazards, see the CPSC. When you weigh the injury risk and the cost of buying winding bars for a one-time job, professional spring replacement is usually the smarter choice.
How to Make Your New Springs Last Longer
Once you replace a garage door spring, a little maintenance doubles its life. Lubricate the torsion spring and the cables with a garage-door-specific lubricant twice a year, keep the door balanced, and have the door tuned up annually. A balanced door and quiet, lubricated hardware take strain off the springs and the opener, so the whole garage door system lasts longer.
Don’t Risk a Torsion Spring — We’ll Replace It Today
One Stop Garage Doors & Gates carries the right springs on the truck and replaces them safely across San Jose, Santa Clara, and the South Bay. Same-day service, upfront pricing, licensed and insured.
Call 650-910-6090When to Call a Professional
Call a pro right away if you have a torsion spring, if both springs are broken, if the door is off its cables, or if you simply do not have the winding bars and experience to replace the spring safely. A licensed technician replaces the spring, inspects the cables and drums, re-balances the door, and tests the opener force and safety reverse — so the whole garage door system is safe, not just the spring. If you are in the South Bay, our local team handles garage door spring replacement in San Jose, Santa Clara, and every nearby city, usually the same day. We also handle full garage door repair and opener repair when a failed spring has strained the rest of the system.
Can I replace a garage door spring myself?
You can replace an extension spring with care while the door is fully open and clamped, but torsion springs are wound under extreme tension and are dangerous without the right winding bars and experience. When in doubt, hire a licensed technician.
How much does it cost to replace a garage door spring?
Professional single torsion spring replacement typically runs $180–$290, and a matched pair costs more. Extension springs are usually less. DIY parts run $80–$200 but require winding bars and exact measurements.
Should I replace one spring or both?
On a two-spring door, replace both. Springs wear at the same rate, so if one has broken the other is close behind. Replacing the pair keeps the door balanced and saves a second service call.
How long do garage door springs last?
Standard springs are rated for about 10,000 cycles — roughly 7 to 12 years for an average household. Doors used many times a day wear springs out faster.
What size spring do I need?
Torsion springs are matched by wire size, inside diameter, and length to your door’s weight and height. Using the wrong spring leaves the door unbalanced and wears out the opener, which is why pros measure precisely.
Is it safe to open my door with a broken spring?
No. With a broken spring the door is extremely heavy and can slam down. Do not force the opener — you can burn it out or cause injury. Leave the door closed and call a technician.