 License: 1143915
To program a garage door remote, you almost always use one button: the “learn” button on the opener motor in your ceiling. Press learn, then press the button on your handheld remote or wireless keypad within about 30 seconds, and the opener stores the new code. This same process works for most brands, including LiftMaster, Chamberlain, Genie, Craftsman, and Linear. If your programming won’t take or your opener is very old, our licensed team at One Stop Garage Doors & Gates can help 24/7 at (650) 910-6090.
Below is a plain-English guide covering handheld remotes, wireless keypads, and your car’s built-in buttons, plus a brand cheat sheet and troubleshooting tips. Every opener differs slightly, so keep your owner’s manual handy.
Step 1: Find the “Learn” Button on the Opener Motor
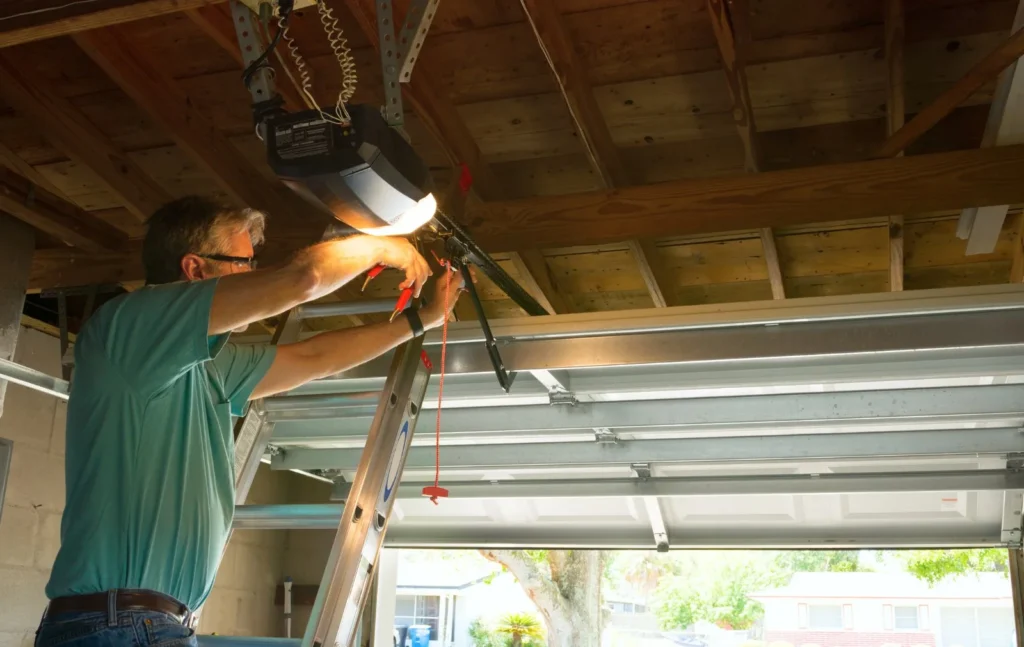
The learn button is the key to every remote you own. It lives on the motor unit mounted to your garage ceiling, not on the wall control by the door, usually on the back or side panel near the antenna wire. Look for a small colored button, sometimes hidden behind a light cover, with an LED indicator beside it. When you press it, the light stays on for about 30 seconds while the opener “listens” for a new signal, so have your remote ready first.
Step 2: Program a Handheld Remote
Once you have found the learn button, adding a handheld remote takes under a minute. Work quickly, because the window is short.
- Press and release the learn button on the opener motor. The LED should light up.
- Within about 30 seconds, press the button on your remote that you want to use.
- Wait for the opener lights to blink or the motor to click. That confirms the code was saved.
- Release the remote button and test it from inside the garage, then from your driveway.
Step 3: Program a Wireless Keypad
A wireless keypad mounts outside your garage and lets you enter a PIN instead of carrying a remote. Programming is like a handheld, with one extra step: you choose your own code first.
- Enter your desired 4-digit PIN on the keypad, then press Enter (or the brand’s send button).
- Press and release the learn button on the opener motor.
- Within 30 seconds, return to the keypad, enter your PIN, and press Enter again.
- The opener lights should flash to confirm. Test the PIN to make sure the door responds.
Some keypads ship with a factory PIN inside the cover that you enter before choosing your own. Follow any printed steps on the unit, then complete the learn-button pairing above.
Brand Cheat Sheet: Learn Button Color and Location
The learn button looks different across brands, and the color often signals the frequency and security your opener uses. Use this table as a quick reference before you climb up.
| Brand | Learn Button Color / Location | Notes |
|---|---|---|
| LiftMaster / Chamberlain | Yellow, green, purple, or red-orange; on the back or side panel near the antenna wire | Button color signals the security format. Match replacement remotes to the color. |
| Genie | Round “Program Set” button, often blue, red, or purple; under the light lens or on the back | Some Genie models use Intellicode. You may press and hold until an LED changes, rather than a single quick press. |
| Craftsman | Orange, purple, green, or yellow; on the back panel (Craftsman openers were built by Chamberlain) | Programs just like LiftMaster/Chamberlain. Match the remote to the button color for compatibility. |
| Linear / Overhead Door | Small learn/program button, often blue or on a circuit board behind a cover | Overhead Door “Code Dodger” and Linear units may need the button held briefly. Check the model label for the frequency. |
Not sure which button color you have? Take a photo of the motor label and call us. Most openers built since the late 1990s use rolling-code security (Security+, Intellicode, or Code Dodger), so an older fixed-code remote usually will not pair with a newer opener.
Step 4: Pair Your Car’s Built-In Buttons (HomeLink / Car2U)
Many vehicles have buttons in the visor or mirror that replace a handheld remote. The two common systems are HomeLink and Car2U, and pairing them uses the same learn button on your opener.
Hold your old working remote a couple of inches from the car’s HomeLink button. Press and hold both the car button and the remote button until the car’s indicator changes from a slow to a rapid blink. Then press the learn button on the opener motor and press the paired car button two or three times until the door responds.
With rolling-code openers, your car often needs this learn-button step even after the visor light blinks. For help with a specific vehicle, see our guide to garage door remote programming in San Jose, or call and we will walk you through it.
Step 5: Erase All Remotes for Security
Erasing every stored remote is smart when you buy a home, lose a remote, or have a code you no longer trust. It clears all handhelds, keypads, and car buttons at once, so plan to reprogram the ones you keep.
To erase, press and hold the learn button for about 6 to 10 seconds, until the LED goes out. When the light turns off, every code is cleared. Then repeat the steps above to reprogram only your current remotes.
Troubleshooting Common Problems
If programming fails or a remote stops working, run through this checklist before assuming the opener is broken:
- Remote won’t program at all: The learn window likely closed. Press the learn button again, then the remote within 30 seconds. Replace the battery first.
- Keypad not responding: Check the keypad battery, re-enter the correct PIN, and make sure you pressed the learn button, not the wall button.
- Works only up close: This usually means a weak remote battery or a damaged antenna wire. Make sure the antenna hangs straight down and is not cut or coiled.
- All remotes stopped at once: A power surge or a full memory can wipe or block codes. Erase all remotes, then reprogram from scratch.
- Wrong remote for the opener: A fixed-code remote will not pair with a rolling-code opener. Confirm the brand and button color match.
Still stuck after a battery swap and a fresh programming attempt? A circuit board or logic issue may be the cause. We handle that daily, including garage door opener repair in Santa Clara when the motor needs service.
When to Call a Pro
DIY programming is usually quick, but a few situations are worth a professional visit. Call us if your opener is more than 15 to 20 years old, if the motor grinds, if programming keeps failing, or if you cannot safely reach the learn button.
One Stop Garage Doors & Gates is family-owned, licensed CSLB #1143915, bonded and insured, and open 24/7. We serve San Jose, Santa Clara, Sunnyvale, Cupertino, Campbell, Los Gatos, Milpitas, Mountain View, and the wider South Bay and Peninsula. For a fast answer or same-day help, call (650) 910-6090.
If your opener brand needs model-specific steps, check the manufacturer directly, such as LiftMaster support.
Frequently Asked Questions
Where is the learn button on my garage door opener?
The learn button is on the opener motor mounted to your garage ceiling, not on the wall control by the door. Look on the back or side panel, often near the antenna wire or under the light lens. It is a small colored button with an LED indicator next to it.
Why won’t my garage door remote program?
The most common reason is timing. After you press the learn button you have about 30 seconds to press the remote, and the window closes quickly. Start over and press the remote faster, and replace the remote battery. If it still fails, the remote may be the wrong type for a rolling-code opener.
Can I program any brand of remote to my opener?
Not always. Modern openers use rolling-code security, so the remote must match the opener’s brand and frequency, which the learn button color often indicates. A fixed-code remote will not pair with a rolling-code opener. Universal remotes work with many brands, but you should confirm compatibility before buying.
How do I erase old remotes from my garage door opener?
Press and hold the learn button on the opener motor for about 6 to 10 seconds until the LED light turns off. That clears every stored remote, keypad, and car button at once. After erasing, reprogram only the remotes and keypad you still want to use.
How do I program my car’s HomeLink or Car2U buttons?
Hold your working handheld remote near the car’s visor button and press both until the car indicator blinks rapidly. Then press the learn button on the opener motor and press the paired car button two or three times. If your opener uses rolling code, the learn-button step is required to finish pairing.
Do I need a locksmith or technician to program a remote?
Usually no, since most remotes and keypads program in under a minute with the learn button. Call a professional if your opener is very old or incompatible, if programming fails after several correct attempts, or if you cannot safely reach the motor. One Stop Garage Doors & Gates can help 24/7 at (650) 910-6090.
Get Help Programming Your Remote Today
Whether you need a quick tip or your opener refuses to cooperate, we are here to help. Call (650) 910-6090 or request service online, and our family-owned team will get your remote or keypad working. We are licensed CSLB #1143915, bonded and insured, and available 24/7 across the South Bay and Peninsula.
Need a Garage Door or Gate Fixed Today?
One Stop Garage Doors & Gates offers same-day service across San Jose, Santa Clara & the South Bay — licensed, upfront pricing, no surprise fees.
Call (650) 910-6090Schedule Online